
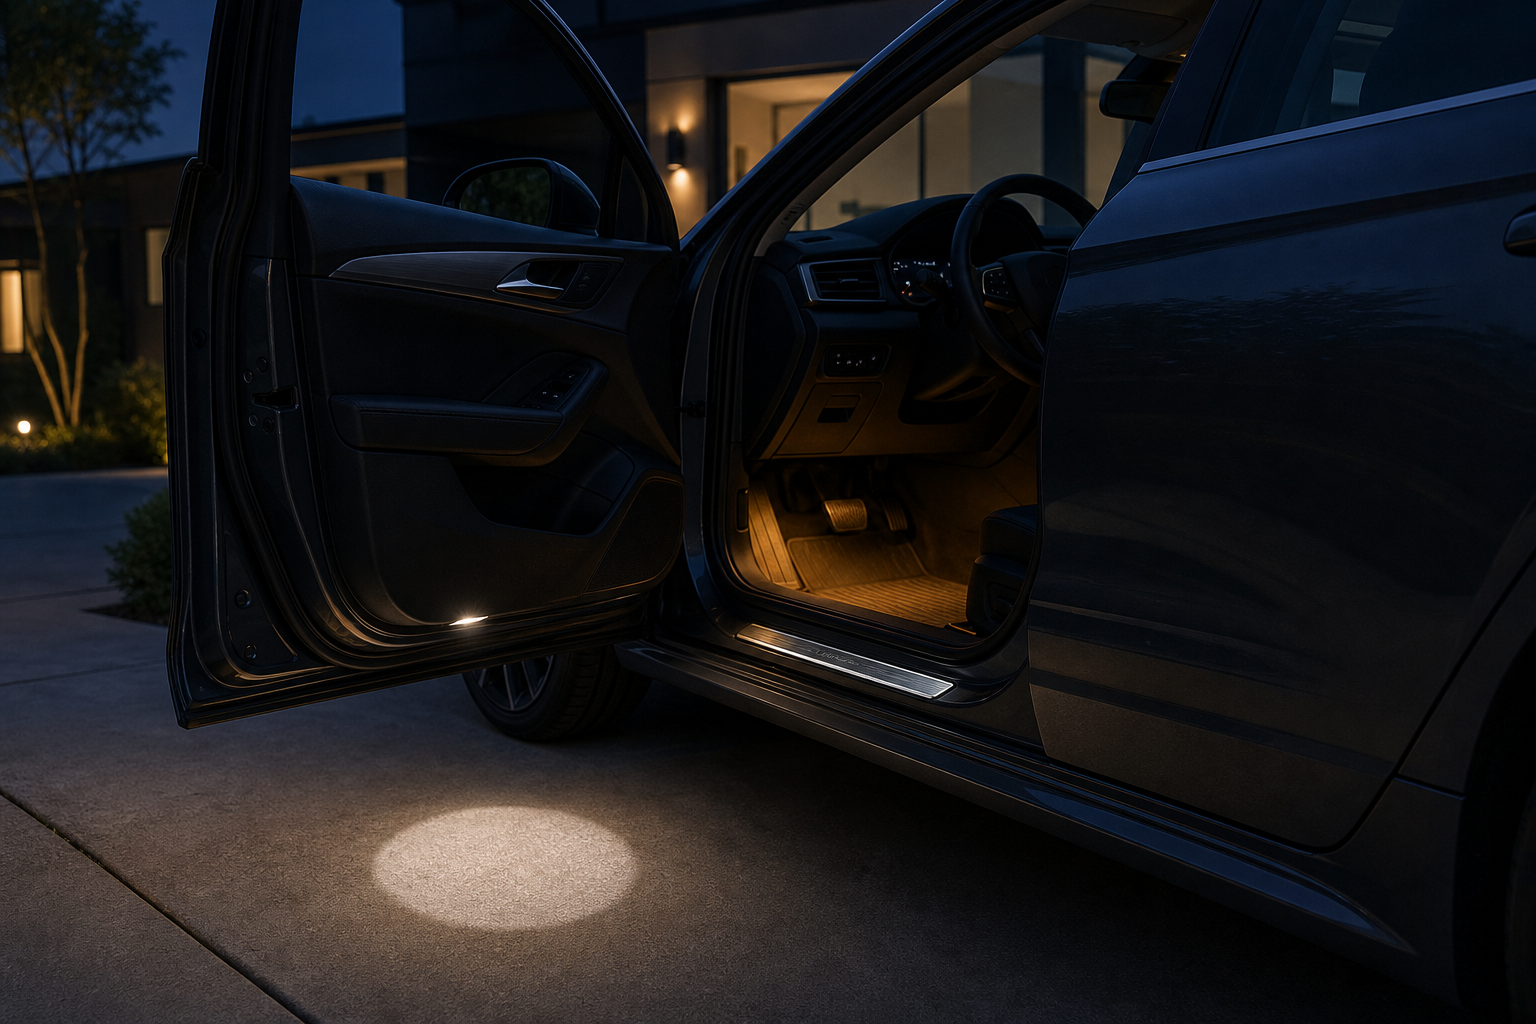
The best car entry-lighting upgrade depends on where you want the light and how much installation work you want to accept. Choose an LED door sill when you want the threshold itself to become the focal point. Choose a wireless door projector when you want a quick, removable pool of light on the ground. Choose interior ambient lights when you want the effect to continue into the cabin rather than stop at the doorway.
All three can make an ordinary door opening feel more considered after dark, but they are not interchangeable. This guide compares their appearance, power needs, installation, cleaning, and everyday practicality so you can match the accessory to your car instead of choosing by a night photograph alone.
Quick comparison
| Upgrade | Best for | Typical installation | Main upkeep |
|---|---|---|---|
| LED door sill | A premium threshold accent | Position, adhere, and connect or charge according to the product design | Keep the sill clean and check adhesion |
| Wireless door projector | A fast, reversible welcome-light effect | Mount on the door and align the sensor/projected image | Battery or charging checks and lens cleaning |
| Interior ambient lights | Footwell and cabin atmosphere | Route multiple light modules and secure loose cable | Inspect routing, connectors, and brightness settings |
1. LED door sills: the strongest threshold statement
An illuminated sill sits where passengers naturally look while stepping into the car. In daylight, the plate can add a brushed-metal or dark trim detail; at night, the light outlines the threshold. That combination makes it the most integrated-looking option of the three when the size, finish, and light temperature suit the interior.
The current LED Door Sills Pro is the relevant catalog option to review for this style. Before ordering, compare the live listing's dimensions, power or charging method, fit notes, included pieces, shipping information, and return terms with your vehicle. “Universal” should never replace measuring the flat mounting area.
What to measure first
- The usable flat length between trim curves and fasteners
- The sill width without covering a weather seal or drainage path
- Door clearance when the door closes
- The cable route or access needed by the specific design
Use low-tack painter's tape to mark the proposed position, then close the door slowly and inspect clearance. Do not place an accessory over factory labels, fasteners, drain openings, or moving trim. If installation requires tapping into factory wiring, removing airbags or restraint trim, or identifying an unfamiliar circuit, use a qualified automotive professional.
2. Wireless door projector lights: the simplest visual change
A projector directs a courtesy image or pool of light onto the pavement when the door opens. Because the visual appears outside the cabin, it is especially noticeable in a dark parking space or driveway. A wireless version can also be easier to reverse because it avoids a permanent wire run.
Car Door Sills carries several vehicle-themed choices, including a set of two wireless BMW door step lights. Brand compatibility matters: confirm that the vehicle and artwork match, and verify the current product specifications before purchase. The store also lists projector options for many other makes, so use the site search rather than assuming one mount or image fits every door.
Alignment matters more than brightness
Temporarily position the projector before pressing an adhesive pad into place. Open the door to its normal angle and check that the image lands on a flat area, appears upright, and is not cut off by the rocker panel. Also verify how the unit detects an open or closed door. A projector that remains illuminated after the door shuts needs repositioning or troubleshooting.
Keep the lens clean with a soft cloth. Road dust and water spots can turn a crisp projection into a blurry one even when the LED is working correctly. Battery-powered units also need periodic charging or replacement; the interval varies with the product, door-opening frequency, temperature, and battery condition.
3. Interior ambient lights: the broadest cabin effect
Ambient kits illuminate footwells or trim areas rather than a single threshold. Their advantage is coverage: a multi-piece system can give front and rear occupants a consistent low-level glow. Their tradeoff is routing. Even a plug-in kit needs cables secured away from pedals, seat rails, sharp edges, heat, and areas where passengers can snag them.
The store's four-piece Car Interior LED Lights offers a current example to compare. Review its live power connection, controls, cable lengths, mounting approach, and supported settings before planning placement. Never route a lead across the driver's footwell or interfere with a pedal's full travel.
Keep cabin lighting restrained while driving
Brightness that looks attractive while parked can become distracting on a dark road or reflect in glass. NHTSA interpretation material on vehicle interior illumination discusses limiting glare visible to a driver and describes illumination that can be dimmed or switched off. That federal material is not a blanket approval for every aftermarket kit, and state, provincial, or local rules may add restrictions. Use a low setting, keep direct emitters out of the driver's sight line, and turn decorative lighting off if it affects visibility.
How to prepare an adhesive mounting surface
Adhesive installations often fail because of surface contamination rather than the accessory itself. First confirm that the included adhesive and cleaner are suitable for the vehicle material, then follow the accessory manufacturer's instructions. For general pressure-sensitive tape practice, 3M says the bonding surfaces should be clean and dry and explains that firm application pressure develops better adhesive contact. Its guidance also notes that some plastics, paints, textured surfaces, or contaminated areas can require different preparation.
- Wash away loose dirt and fully dry the area.
- Test any cleaner on an inconspicuous spot and follow its safety directions.
- Remove oil, dressing, wax, and fingerprints from the intended bond area.
- Mock up the exact position before removing the liner.
- Apply even pressure across the full adhesive surface.
- Respect the product's stated temperature and cure-time guidance before stressing the bond.
Do not assume every automotive trim surface should be abraded or primed. Those steps can permanently alter a finish. Use them only when the tape and vehicle-surface instructions specifically call for them.
Power choice: rechargeable, replaceable battery, or vehicle power
A self-contained rechargeable or replaceable-battery light isolates the accessory from the vehicle electrical system and simplifies removal. The compromise is routine charging or battery replacement. A vehicle-powered kit avoids that routine but creates a greater need for correct circuit choice, fuse protection, cable routing, and shutoff behavior.
After installing a powered accessory, confirm that it turns off exactly as intended and recheck after the vehicle has been parked. AutoZone's current guidance identifies lights and aftermarket accessories among possible sources of parasitic battery draw. If the car begins cranking slowly, a light stays on, or the electrical system behaves differently after installation, disconnect the accessory when safe and have the circuit diagnosed rather than repeatedly jump-starting the vehicle.
Which upgrade should you choose?
- Choose an LED sill when you want the most finished-looking threshold accent and are willing to measure carefully.
- Choose a wireless projector when you want a quick, removable effect with minimal routing.
- Choose ambient lighting when the cabin experience matters more than the view from outside.
- Combine upgrades selectively when brightness and color temperature can be coordinated without visual clutter.
A coherent installation usually uses one dominant effect and one supporting effect. For example, a softly illuminated sill can pair with a simple white courtesy projection, while strong multicolor footwell light plus bright projectors plus bright sills may compete. Photograph a temporary setup at night before making every mount permanent.
Frequently asked questions
Do LED door sills fit every car?
No. Even products marketed broadly should be checked against the available flat space, door clearance, trim shape, weather seals, and the live product dimensions.
Can door projector lights drain a car battery?
A self-contained battery projector does not normally draw from the vehicle battery. A vehicle-powered accessory can contribute to battery draw if it is wired incorrectly or fails to shut off. Follow the specific instructions and investigate any change in starting or electrical behavior.
Are decorative car lights legal?
Rules vary by location, light color, mounting position, visibility outside the vehicle, and whether the vehicle is moving. NHTSA notes that supplemental lighting must not impair required lighting and that state law can govern use by vehicle owners. Check the rules where the vehicle is registered and driven.
Will adhesive damage interior trim?
That depends on the adhesive, surface coating, age, heat exposure, and removal method. Confirm material compatibility, test discreetly, and never use an aggressive cleaner or primer without product-specific guidance.
Final pre-install checklist
Confirm the product, dimensions, vehicle compatibility, power method, shutoff behavior, cable route, local lighting rules, and return terms before installation. Clean and dry the mounting surface, test the position, preserve every factory safety feature, and stop if the work reaches an unfamiliar electrical or restraint component. A careful installation should look intentional in daylight, work reliably after dark, and remain unobtrusive while the car is in motion.